
![]()
News
FitRunner 1.1.1 (9/5/2005): FitRunner works with FIT 1.1 now.
New Home for FitRunner (5/20/2005): This project is moved to SourceForge! A new Project Statement is also released.
Update site (8/29/2004): See Installation for more details.
Version 1.1.0 (7/3/2004):
- Exclusion files and folders can be specified. For example, CVS folders should be excluded.
- Generates summary.html. A summary.html is generated for each acceptance test folder, so the tests can be organized in different folders.
You may install this plug-in using the update site or download a zip file and install manually.
Using the update site:
- In the main menu, select Help > Softeware Updates > Find and Install.
- Select Search for new features to install, and click Next.
- Click on New Remote Site... In the pop-up dialog, input FitRunner in the Name field, and http://FitRunner.sourceforge.net/site.xml in the URL field. Click OK.
- A new bookmark will appear in the Install dialog. Check the check box right at the left side of the FitRunner bookmark. Click Next.
- Select all the features, and click Next.
- (You know what to do from now on, don't you?)
Manual Installation:
- Remove older version of the plug-in from the plugin folder.
- Download the plugin from here.
- Unzip the file to the Eclipse folder.
- Start Eclipse.
- Select Run... from the drop-down menu of this button:
 from the toolbar. The Launcher Configuration dialog will show:
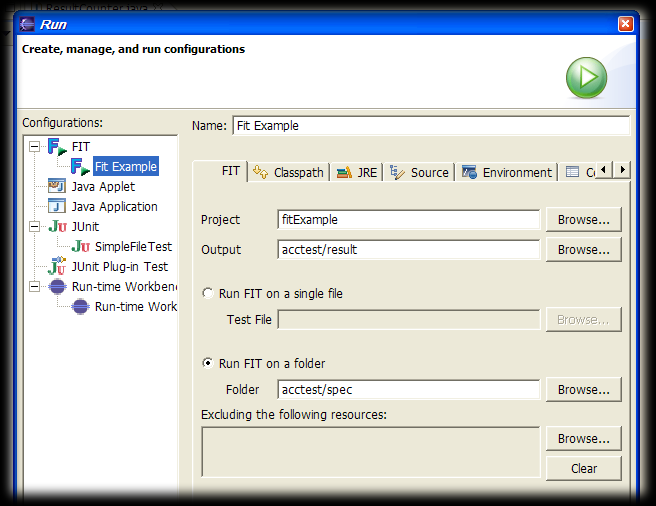
- Select FIT fron Configurations, and click New button. A new launcher configuration for FIT will be created. Specify the Project, Output Folder, and the test file (or the folder that contains several tests). It is recommended also to specify a name for the configuration. If a test folder is specified, all the files (HTML or not) in the folder and in the sub-folders will be run. The same folder structure will be created in the output folder. Tests specified in the exclusion list will not be run.
- Click Apply to save the configuration, or click Run to run the test(s). A summary will be printed in the console view, and summary files will be created.